Obstacle avoiding robotic car using adafruit motor shield & arduino UNO
- nik patel
- Oct 2, 2020
- 3 min read
Updated: Oct 2, 2020
This tutorial involves building a roboic car with an ultrasonic sensor that
can detect nearby objects and change its direction to avoid these objects.
The ultrasonic sensor will be attached to a servo motor which is constantly scanning
left and right looking for objects in its way.


Hardware Required:
Arduino Board
Adafruit Motor Shield
Ultrasonic Sensor (HC-SR04)
DC Motor x2
Wheel x2
Chassis plate

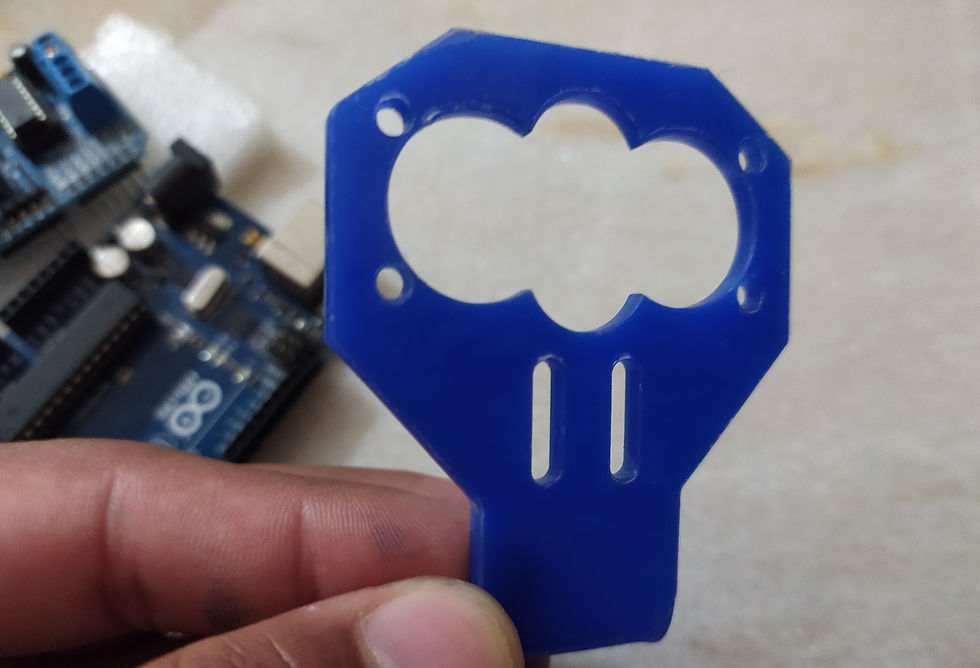
Holder for HC-SR04
Battery 9V
Battery cap
jumper Wires
Button
Connection of Chassis:


The DC motors attach to the chassis.
The Arduino attach to the chassis.
The Motor Shield attach to the Arduino.
The Servo motor attach to the chassis.
The HC-SR04 holder attach to Servo.
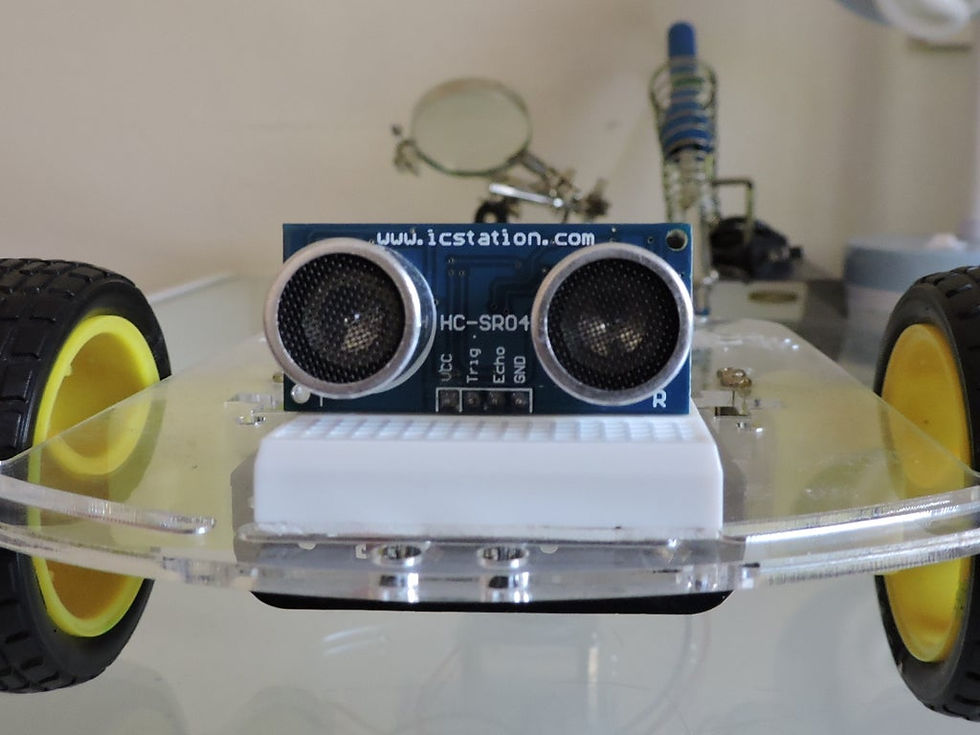
The HC-SR04 sensor attach to Servo.
Note: here, I have use breadboard instead of servo, but you can use servo.
About motor shield:

The motor controllers on this shield are designed to run from 4.5V to 25V.
There are two places you can get your motor 'high voltage supply' from. One is the DC jack on the Ardiuno board and the other is the 2-terminal block on the shield that is labeled EXT_PWR.
To connect a motor, simply solder two wires to the terminals and then connect them to either the M1, M2.
Hobby servos are the easiest way to get going with motor control. They have a 3-pin 0.1" female header connection with +5V, ground and signal inputs. The motor shield simply brings out the 16 bit PWM output lines to two 3-pin headers so that it's easy to plug in and go.
Power for the Servos comes from the Arduino's on-board 5V regulator, powered directly from the USB or DC power jack on the Arduino.
Reference:
https://www.instructables.com/Arduino-Obstacle-Avoiding-Robot-4WD
Connection:


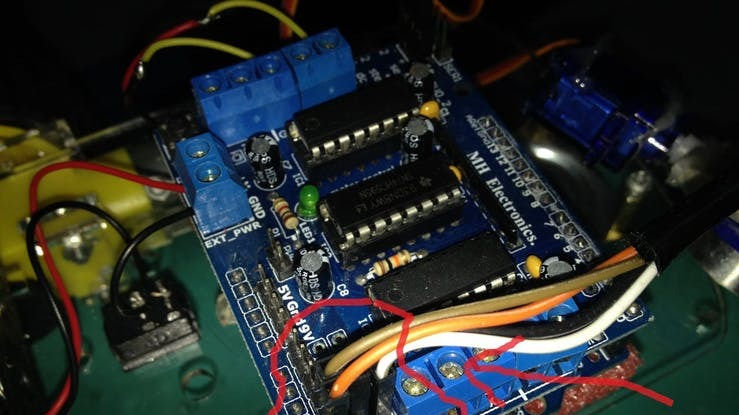
DC Motors connect to the Motor Shield.
Left Motors connect to M1(right) (If the motors run backwards, change the (+) and (-) connections).
Right Motors connect to M2(left).
The Servo motor connect to the Motor Shield.
The Servo1 input is connected to the Arduino Digital 10 input
The Servo2 input is connected to the Arduino Digital 9 input
Power for the Servos comes from the Arduino's on-board 5V regulator, powered directly from the USB or DC power jack on the Arduino
Note: here i have only 2 DC motors, M1, M2
The HC-SR04 Sensor connections:

The HC-SR04 Sensor VCC connect to the Arduino +5V
The HC-SR04 Sensor GND connect to the Arduino Ground
The HC-SR04 Sensor Trig connect to the Arduino Analog 0
The HC-SR04 Sensor Echo connect to the Arduino Analog 1
Battery and on / off button connection:
The (+) from the battery is connect to a leg of the button
Connect a cable to the other legs of the button. This cable is for Motor Shield (+)
2 seperate DC power supplies for the Arduino and motors.
Plug in the supply for the Arduino into the DC jack, and connect the motor supply to the PWR_EXT block. Make sure the jumper is removed from the motor shield.
Attach the wheels
Download code and install the arduino library:
Open the new Arduino IDE page
Delete everything on the page
Get the code in here link
Paste empty Arduino IDE page
First Install the Arduino Library
The AF_Motor Arduino library
Before you can use the Motor shield, you must install the AF_Motor Arduino library.
Close the Arduino IDE
Download the library:
https://github.com/adafruit/Adafruit-Motor-Shield-library
Uncompress the ZIP file onto your desktop
Check that inside AFMotor is AFMotor.cpp and AFMotor.h files
Place the AFMotor folder into your arduino sketch folder/libraries folder. For Windows, this will probably be something like MY Documents/Arduino/libraries for Mac it will be something like Documents/arduino/libraries. If this is the first time you are installing a library, you'll need to create the libraries folder. Make sure to call it libraries exactly, no caps, no other name.
The NewPing Arduino Library:
Download the library: https://bitbucket.org/teckel12/arduino-new-ping/downloads
Uncompress the ZIP file onto your desktop
Move to the Arduino library folder
Restart the IDE
Now you can see the libraries you have installed
When you verify, you will not see any errors
About Code:
Using DC Motors with the Motor Shield
The motor shield can drive up to 2 DC motors bi-directionally. That means they can be driven forwards and backwards.
To connect a motor, simply solder two wires to the terminals and then connect them to either the M1, M2.
Using the HC-SR04 with the NewPing Library:
NewPing sonar(trigger_pin, echo_pin [, max_cm_distance]);
Example;
NewPing sonar(10, 12, 220);
This initializes NewPing to use pin 10 for trigger output, pin 12 for echo input, with a maximum ping distance of 220 cm. max_cm_distance is optional [default = 500cm]. If connecting using a single pin, specify the same pin for both trigger_pin and echo_pin as the same pin is doing both functions.
Reference:
http://playground.arduino.cc/Code/NewPing
Download full code here link:
Result:


.png)


Car interior detailing is an essential aspect of car maintenance, which involves a deep cleaning of the car's interior surfaces to restore its appearance. Car Interior Detailing Services involves cleaning the https://www.attn2detail.info/ceramic-coatings/ seats, and other interior surfaces to remove dirt.